
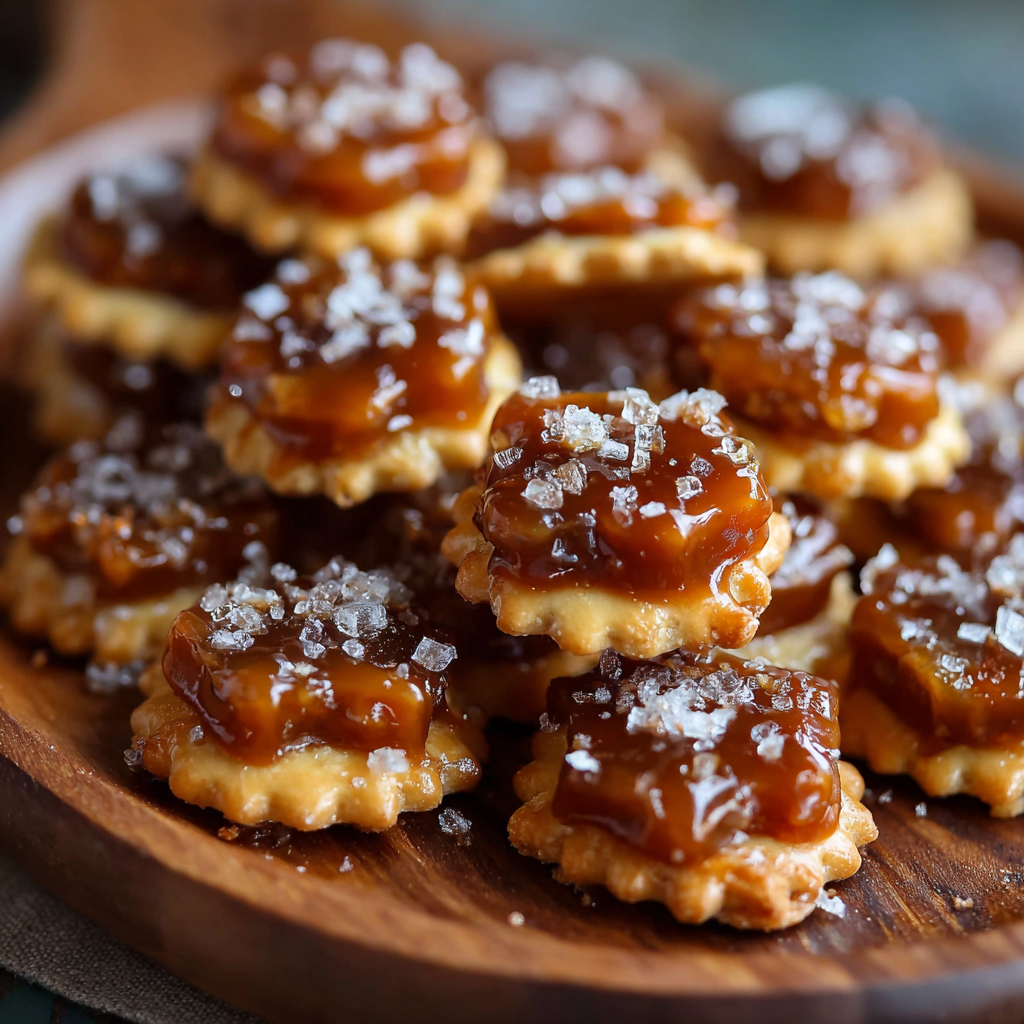
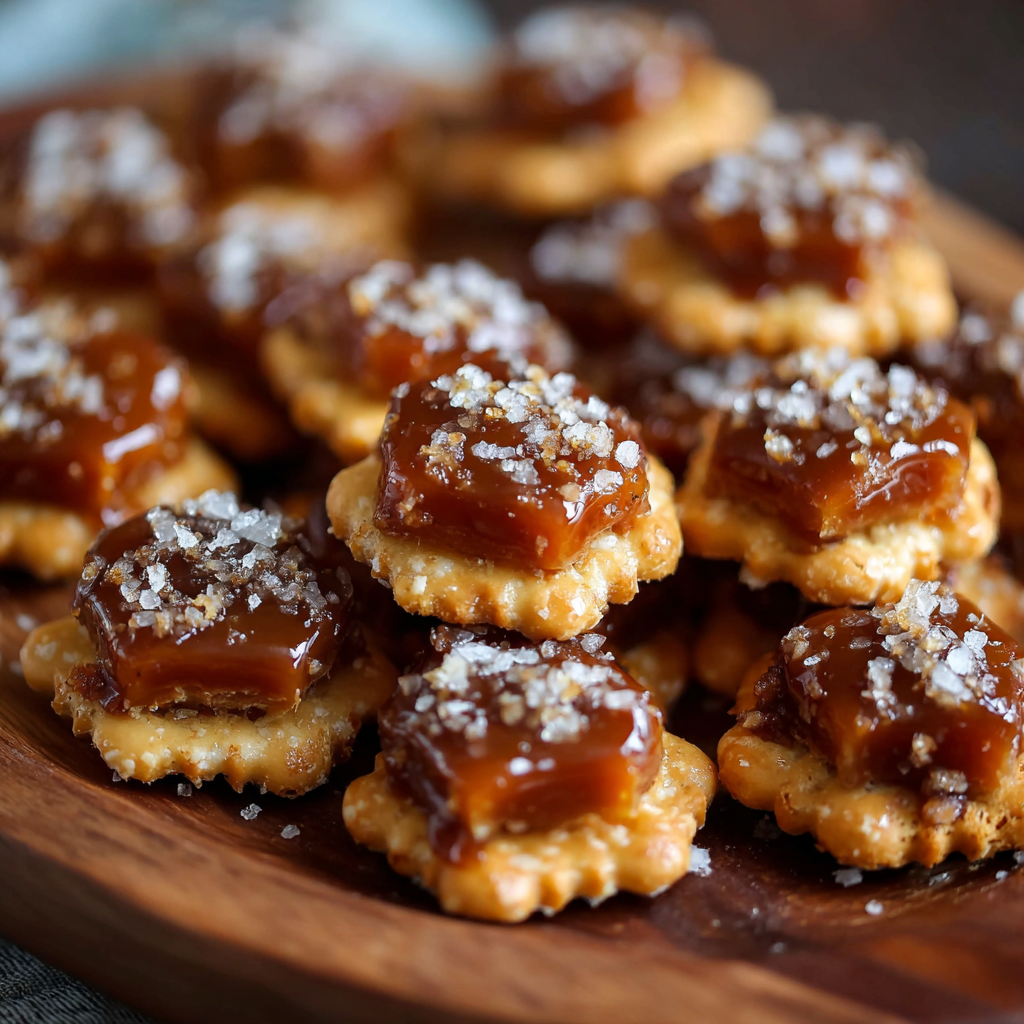
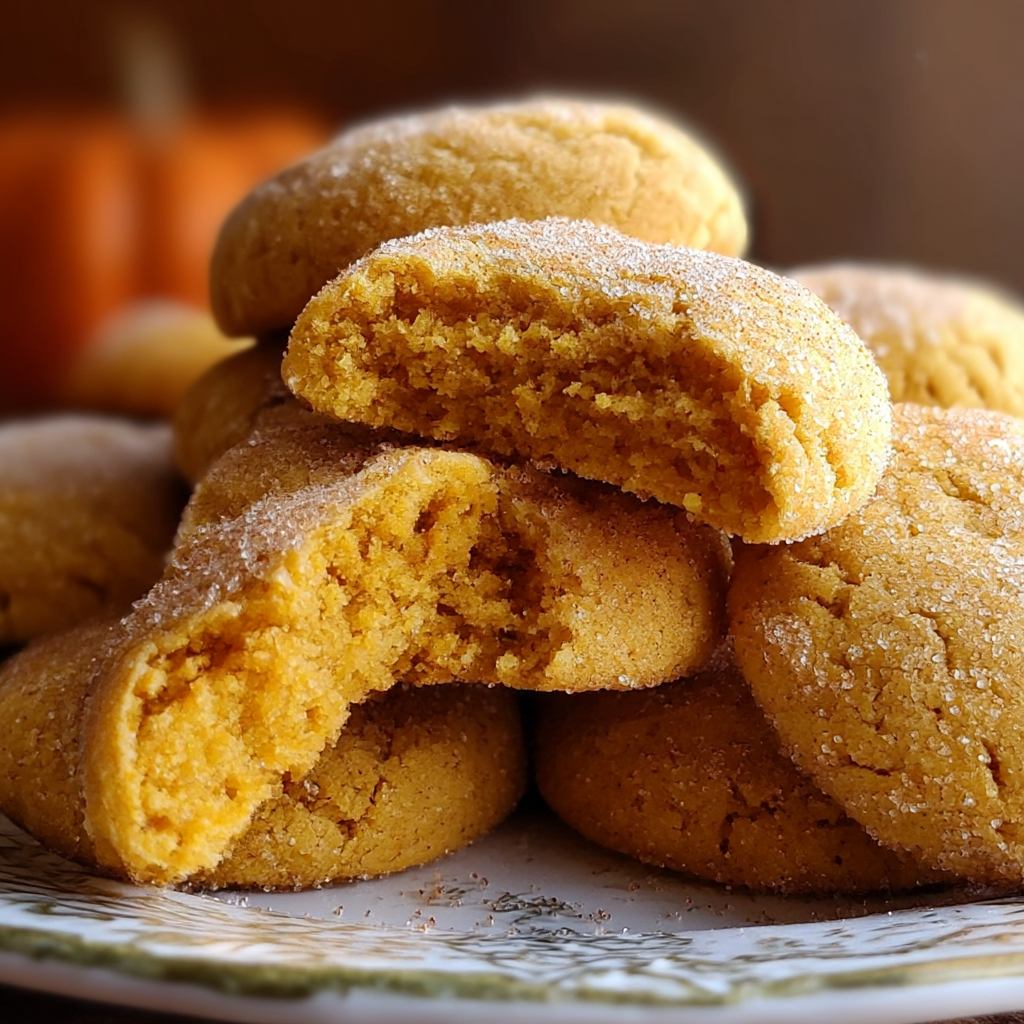
Salted Caramel Cracker Bites

Sweet, salty, and irresistible little clusters of oyster crackers coated in buttery caramel — a 25-minute treat perfect for parties, snack bowls, and last-minute desserts.
This sticky, crunchy treat has been my go-to when friends drop by unexpectedly or when I need a little something to sweeten an ordinary afternoon. I first made these salted caramel cracker bites on a rainy Saturday afternoon when my pantry offered little more than a box of oyster crackers and a stick of butter. The result was so moreish — a perfect balance of deep brown sugar caramel, a whisper of vanilla, and the tiny crackle of oyster crackers — that I began keeping the ingredients on hand for spur-of-the-moment gatherings. They come together quickly, smell impossibly good while baking, and always disappear fast.
What makes these bites special is the way simple pantry staples transform into something celebratory: the butter and brown sugar create a silky caramel that clings to the tiny crackers, then browns slightly in the oven to add toasty, nutty notes. A quick sprinkle of coarse salt at the end lifts the whole flavor into perfect balance — not cloying, but deeply satisfying. I love watching guests break the cooled clusters apart and exclaim at the deep caramel flavor. They’re ideal for holiday snack boards, movie nights, or tied up in small bags as handmade gifts.
Why You'll Love This Recipe
- Ready in roughly 25 minutes from start to finish, this snack is a fast crowd-pleaser when you need something sweet immediately.
- Uses pantry staples: a single 9-ounce package of oyster crackers, brown sugar, butter, vanilla, cinnamon, and salt make an impressive treat without extra shopping.
- Make-ahead friendly: once cooled, these stay crisp in an airtight container for several days, making them great for party prep or gifting.
- Customizable: adjust salt level, swap spices, or add nuts or chocolate after baking to tailor to dietary preferences or occasion.
- Small-bite format: perfect for snack bowls, lunchbox add-ons, or to serve on a dessert table where guests graze.
- Very forgiving technique: the caramel is stable with a short boil and visual cues are simple so it’s great for cooks of any skill level.
I still remember the first time I served these at a casual book club night — everyone kept reaching for more and trading tips. My sister asked for the recipe by the end of the evening, and now she makes them for teacher gifts every winter. They’ve proven to be one of those humble recipes that reliably impress without fuss.
Ingredients
- Oyster crackers (1 9-ounce package): Small, crunchy, and mild, these crackers are ideal because their tiny size creates lots of caramel-coated surface area. Look for plain oyster crackers rather than seasoned varieties; common supermarket brands work perfectly.
- Butter (1 cup / 2 sticks): Unsalted butter is recommended so you can control the salt level at the end. Use a real dairy butter for the best flavor — brands like Land O'Lakes or Kerrygold produce a deep, creamy caramel when melted.
- Brown sugar (1 cup): Light or dark brown sugar will both work; dark will give a deeper molasses note. Pack the cup lightly when measuring to get the right caramel consistency.
- Vanilla extract (2 teaspoons): Pure vanilla extract adds warm, rounded flavor; avoid imitation for the best aroma.
- Cinnamon (1/2 teaspoon): A hint of cinnamon complements the caramel and adds warmth. Ground cinnamon is all you need.
- Salt (1 teaspoon): Use coarse flaky salt or sea salt to finish. Sprinkle once the coated crackers cool slightly so the salt remains perceptible and crunchy.
Instructions
Preheat and prepare: Preheat your oven to 350°F (175°C). Line a rimmed baking sheet with parchment paper for easy cleanup and to prevent sticking. Use a baking sheet with shallow edges so the cracker clusters can be spread in a single even layer. This step ensures consistent heating of the caramel-coated crackers. Arrange crackers: Spread the 9-ounce package of oyster crackers in a single layer across the prepared sheet. Give them a light shake so they sit evenly; clumps will still work but even distribution promotes uniform coating and baking. Make the caramel: In a medium saucepan over medium heat, melt the 1 cup (2 sticks) of butter. Add 1 cup packed brown sugar, 2 teaspoons vanilla extract, and 1/2 teaspoon ground cinnamon. Stir constantly as the sugar dissolves. Bring the mixture to a gentle boil and allow it to boil for 2 to 3 minutes while stirring; this brief boil thickens the syrup and cooks out any raw sugar taste. Watch the color: it should become glossy and slightly lighter than raw brown sugar. Coat the crackers: Remove the caramel from the heat immediately and pour it evenly over the crackers. Use a heatproof spatula to gently fold and toss so each cracker gets a glossy coating. Work quickly but carefully — the caramel will be hot and fluid. If a few crackers are under-coated, you can spoon extra caramel over them. Bake briefly: Transfer the baking sheet to the 350°F oven and bake for 7 to 9 minutes. Keep a close eye — you want the caramel to set and begin to bubble and turn slightly darker, but not burn. The oven time gives the caramel a slight toasty edge and helps form biteable clusters as the coating firms. Cool and salt: Remove from the oven and let the crackers cool completely on the sheet — about 20 to 30 minutes. As soon as the caramel firms but is still tacky, sprinkle 1 teaspoon of coarse salt evenly across the top; the salt will adhere and give those bright savory highlights. Once fully cooled, break into clusters and transfer to an airtight container.
You Must Know
- These keep well in an airtight container at room temperature for up to 5 days; refrigeration will make them chewier and is not recommended for best texture.
- They freeze well for up to 3 months if stored in a freezer-safe container; thaw at room temperature for 30 minutes before serving.
- High in simple carbohydrates and butter; enjoy in moderation as an occasional treat and consider smaller serving portions for calorie control.
- Small adjustments to the boil time change the caramel’s firmness: a slightly shorter boil yields a softer chew, a longer boil (very carefully) results in a firmer, crunchier candy shell.
- Perfect for crowds because a single batch produces many bite-size pieces and can be easily doubled on two baking sheets.
My favorite part of this bite is how a little sprinkle of flaky salt at the end turns each piece from good to unforgettable. Friends often ask how such a simple snack can taste so layered; the trick is warm caramel chemistry and finishing salt. I’ve served these at summer barbecues, cozy winters, and surprise dessert plates — they always start conversations and get eaten fast.
Storage Tips
Store cooled clusters in an airtight container at room temperature for best texture; avoid refrigeration which aggregates moisture and softens the crisp caramel shell. If stacking pieces, separate layers with parchment to prevent sticking. For longer storage, freeze in a shallow, airtight container for up to three months — allow them to come to room temperature on the counter for 20 to 30 minutes before serving so the caramel regains its ideal bite.
Ingredient Substitutions
If you need dairy-free options, substitute the butter with 1 cup of a plant-based stick margarine formulated for baking; note the flavor will be slightly different and salt adjustment may be needed. For a lower-sugar twist, reduce the brown sugar to 3/4 cup and add 1 to 2 tablespoons of maple syrup to maintain gloss and stickiness. Swap in gluten-free savory crackers of similar size if avoiding gluten — texture will be similar but watch baking time closely since some gluten-free crackers brown faster.
Serving Suggestions
Serve in a large bowl for casual snacking, or arrange clusters on a dessert board with fresh fruit, cheese, and nuts for a balance of sweet and savory. They make thoughtful homemade gifts when put into cellophane bags and tied with ribbon. For an indulgent dessert, sprinkle chopped clusters over vanilla ice cream or fold them into whipped cream as a crunchy component.
Cultural Background
Caramel-coated snack clusters are a beloved American quick confection tradition — think of party mixes and toffee-like treats that rely on simple caramel chemistry. Small crackers and pretzels have long been used to create crunchy, sweet-salty bites in home kitchens because they’re affordable, shelf-stable, and beloved by many. This specific oyster-cracker version is a modern pantry hack that borrows from classic toffee techniques but keeps preparation minimal and approachable.
Seasonal Adaptations
In colder months, add 1/4 teaspoon ground nutmeg or a pinch of ground cloves to the caramel for warming spice notes. For summer, fold in toasted pepitas or chopped roasted almonds after baking for a lighter, nutty crunch. Around the holidays, drizzle with melted dark chocolate and sea salt once cooled to make them feel more festive and gift-ready.
Meal Prep Tips
Make a double batch and portion into small resealable containers or snack bags for grab-and-go treats that hold up well for a few days. Bake on two sheets simultaneously if needed, and cool on the sheet until set before transferring. Label containers with the date; clusters stored at room temperature will stay best for about five days.
These salted caramel cracker bites combine humble ingredients with simple technique for maximum payoff. They’re reliable, quick, and endlessly adaptable — a recipe that’s become part of my regular entertaining toolbox. Give them a try and make them your own with spice tweaks, nut additions, or a chocolate drizzle.
Pro Tips
Use unsalted butter so you can control the amount and timing of finishing salt.
Boil the caramel for 2 to 3 minutes; this short time thickens the sauce enough to coat crackers without overcooking.
Sprinkle flaky sea salt while the caramel is still tacky so the crystals adhere and provide crunchy bursts of flavor.
Line the baking sheet with parchment for easy cleanup and to prevent sticking during cooling.
Work quickly when pouring caramel over crackers — it sets faster than you might expect.
This nourishing salted caramel cracker bites recipe is sure to be a staple in your kitchen. Enjoy every moist, high protein slice — it is perfect for breakfast or as a wholesome snack any time.
FAQs about Recipes
How long do they keep?
Yes. Store in an airtight container at room temperature for up to 5 days. Freezing for up to 3 months is also possible.
Can I make these gluten-free or dairy-free?
Use gluten-free bite-sized crackers and a dairy-free butter to adapt the recipe, noting texture and flavor differences.
How do I know when they are done?
Keep a close eye during the 7-9 minute bake; look for bubbling and a slightly darker caramel color without any black specks.
Tags
Salted Caramel Cracker Bites
This Salted Caramel Cracker Bites recipe makes perfectly juicy, tender, and flavorful steak every time! Serve with potatoes and a side salad for an unforgettable dinner in under 30 minutes.
Instructions
Preheat and prepare
Preheat oven to 350°F (175°C) and line a rimmed baking sheet with parchment paper to prevent sticking and facilitate cleanup.
Arrange crackers
Spread the 9-ounce package of oyster crackers in a single even layer across the prepared sheet so they heat and coat uniformly.
Make the caramel
In a medium saucepan over medium heat, melt 1 cup (2 sticks) butter. Stir in 1 cup packed brown sugar, 2 teaspoons vanilla, and 1/2 teaspoon cinnamon. Bring to a gentle boil and let boil for 2 to 3 minutes while stirring constantly until glossy and slightly thickened.
Coat crackers
Remove caramel from heat and pour evenly over crackers. Use a heatproof spatula to gently fold and toss so each cracker is coated. Work quickly — hot caramel will set as it cools.
Bake briefly
Bake at 350°F for 7 to 9 minutes, watching carefully. The caramel should bubble and deepen slightly in color without burning.
Cool and finish
Let cool completely on the baking sheet until set, about 20 to 30 minutes. Sprinkle 1 teaspoon coarse sea salt across the still-tacky caramel, then break into clusters and store in an airtight container.
Last Step: Please leave a rating and comment letting us know how you liked this recipe! This helps our business to thrive and continue providing free, high-quality recipes for you.
Nutrition
Did You Make This?
Leave a comment & rating below or tag
@kitchenfunwithmy3sons on social media!
Categories:
You might also like...
Sausage Dipped Pancakes Delight
Juicy breakfast sausages wrapped in pillowy golden pancakes — a cozy, crowd-pleasing morning treat served with warm maple syrup and fresh berries.
Fried Cheese Stuffed Doritos
Mozzarella sticks coated in crushed Doritos and fried until golden, crunchy, and irresistibly gooey — a crunchy, snackable twist on a classic favorite.
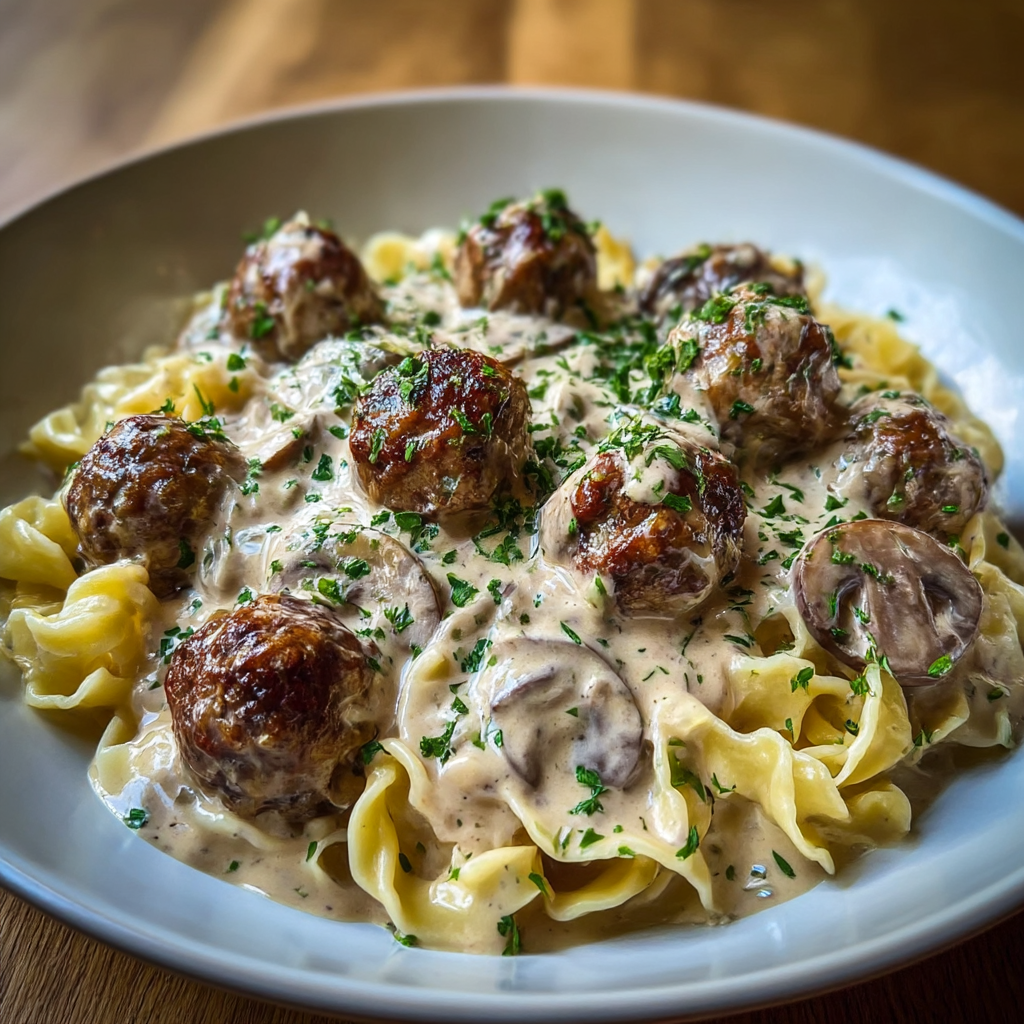
Meatball Stroganoff — Dreamy Cream Sauce
Juicy pan-seared meatballs simmered in a luscious mushroom and sour cream sauce — a comforting stovetop meal inspired by Eastern European flavors.
Did You Make This?
Leave a comment & rating below or tag @kitchenfunwithmysons on social media!
Rate This Recipe
Share This Recipe
Enjoyed this recipe? Share it with friends and family, and don't forget to leave a review!
Comments (1)
This recipe looks amazing! Can't wait to try it.
Comments are stored locally in your browser. Server comments are displayed alongside your local comments.
Hi, I'm Julia!
What's Popular
Get My 30-Minute Meals email series!
Quick and easy dinner ideas delivered to your inbox.