
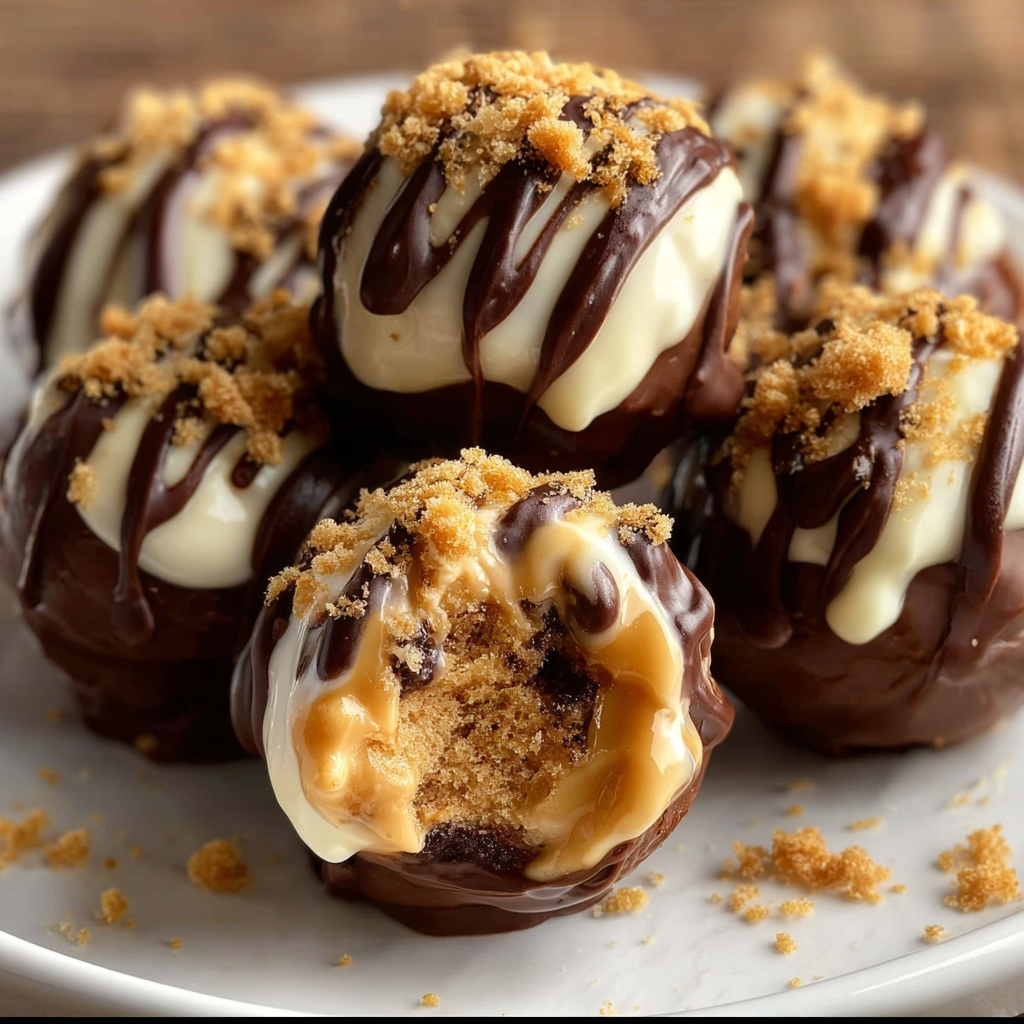
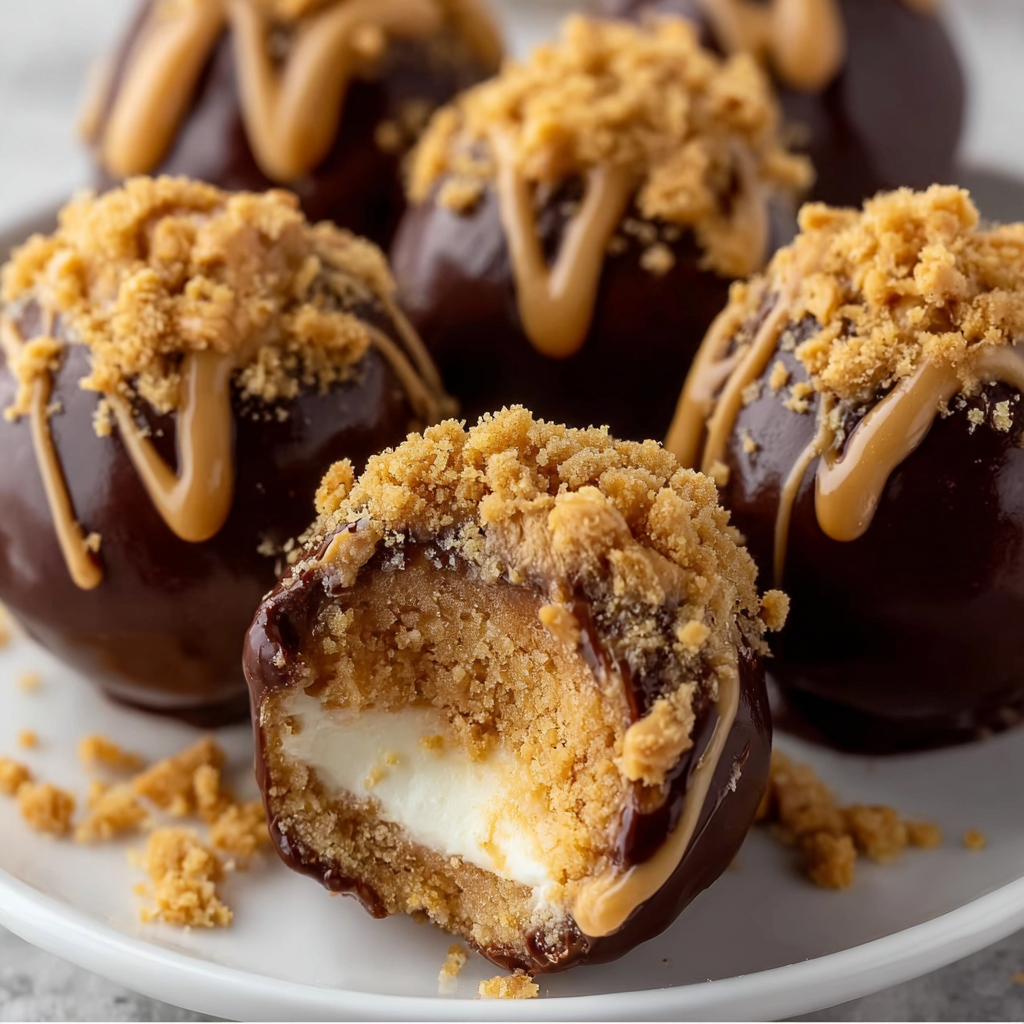
No-Bake Peanut Butter Cheesecake Balls

Creamy peanut butter and tangy cream cheese rolled into bite-sized treats, dipped in chocolate for an irresistible no-bake indulgence.
This no-bake peanut butter cheesecake balls recipe arrived in my life during a lazy summer afternoon when I wanted something rich and indulgent without firing up the oven. I had a jar of creamy peanut butter that needed using and a craving for something bite-sized and shareable. The combination of smooth cream cheese and velvety peanut butter, sweetened with powdered sugar and held together with graham cracker crumbs, felt like the perfect balance between cheesecake and candy. It quickly became my go-to quick dessert for last-minute guests and potluck contributions.
What makes these bites special is the texture contrast. Inside, the mixture is dense, slightly tangy from the cream cheese, and unmistakably peanut buttery. Outside, a crisp chocolate shell gives a satisfying snap the moment you bite in. I discovered how forgiving the recipe is when I made them with my kids — they loved rolling the balls and sprinkling crushed peanuts on top. Over time I refined the chilling and coating steps to ensure the chocolate sets smoothly without streaks and the centers remain creamy. These are now a staple in my fridge when I want a small sweet that always impresses.
Why You'll Love This Recipe
- Ready without an oven: assemble, chill, and dip. Perfect when you want dessert fast and without heat.
- Uses pantry staples like cream cheese, peanut butter, and graham crackers so you rarely need a special shopping trip.
- Make-ahead friendly: prepare the centers a day in advance and coat them right before serving for best texture.
- Crowd-pleasing and portable: bite-sized for parties or lunchboxes and simple to transport in a lined container.
- Customizable: swap chocolate types, add mix-ins, or use crushed cookies for different flavor profiles while keeping the basic method intact.
- Quick production: active hands-on time is about 20 minutes and chilling is the only passive time required.
My family always gravitates toward these at gatherings. Neighbors have taken them to barbecues and come back asking for the recipe. I love that they feel fancy but are genuinely easy to make. The first time I made a double batch for a school fundraiser they disappeared within the hour, and I knew I had a keeper.
Ingredients
- Cream cheese 8 oz: Full-fat cream cheese yields the creamiest interior. Let it soften at room temperature for 20 to 30 minutes for easier mixing. Brand tip: Philadelphia gives a reliably smooth texture.
- Creamy peanut butter 1 cup: Use a smooth, well-stirred jar rather than natural separated oil jars unless you blend it first. Jif or Skippy work well for a consistent sweetness and texture.
- Powdered sugar 1 cup: Confectioners' sugar dissolves into the filling giving sweetness and structure without graininess. Sift if needed for extra smoothness.
- Vanilla extract 1 tsp: Real vanilla lifts flavor and softens the peanut butter edge. If you have vanilla bean paste, use 1/2 tsp for a richer aroma.
- Graham cracker crumbs 1 1/2 cups: These add structure and a hint of honey. Crush whole crackers in a food processor or place in a sealed bag and roll with a rolling pin.
- Semi-sweet chocolate 8 oz: For coating. Use good quality chips or chopped bars for a glossy shell. Darker chocolate will make the bites less sweet.
- Coconut oil 2 tbsp (optional): Thins the chocolate for easier dipping and helps the shell set with a shiny finish. Substitute vegetable oil if needed.
- Crushed peanuts or sprinkles: For garnish. Toast peanuts for extra depth and crunch.
Instructions
Prepare the Filling: In a large bowl, beat the softened cream cheese with an electric mixer until smooth. Add the creamy peanut butter, powdered sugar, and vanilla extract. Beat on medium-high until completely incorporated and silky, about 2 to 3 minutes. Scrape the bowl once to ensure there are no streaks of cream cheese. The mixture should be lump-free and spreadable but not runny. Add Graham Cracker Crumbs: Fold in the graham cracker crumbs gradually with a spatula. Start with half the crumbs and test the texture. You want a mixture that holds together when pinched. If it feels too soft, add the remaining crumbs. The crumbs absorb moisture and give the filling body so balls maintain their shape. Form the Balls: Use a 1-inch cookie scoop or lightly oiled hands to portion the filling into uniform balls. Roll each portion gently between your palms for a smooth surface. Place the finished balls on a baking sheet lined with parchment paper with a little space between each ball to allow for easy dipping. Chill Until Firm: Refrigerate the balls for at least 30 minutes. Chilling firms the centers and prevents them from becoming soft when dipped in warm chocolate. For best results chill for 1 hour if time allows. Melt the Chocolate: In a microwave-safe bowl, combine the chocolate and coconut oil. Microwave in 30-second intervals, stirring between each, until fully melted and glossy. Overheating can seize the chocolate; remove when most of the chocolate is melted and stir to finish melting from residual heat. Coat the Balls: Use a fork or dipping tool to lower each chilled ball into the melted chocolate, swirling to coat evenly. Tap the fork on the edge of the bowl to remove excess chocolate and return the coated ball to the parchment. If using a toothpick, gently lift and twist to release the ball cleanly. Garnish and Set: Before the chocolate firms, sprinkle crushed peanuts or sprinkles on top. Refrigerate the coated balls for 15 to 20 minutes until the chocolate shell is fully set. Store finished bites in an airtight container in the refrigerator for up to 1 week.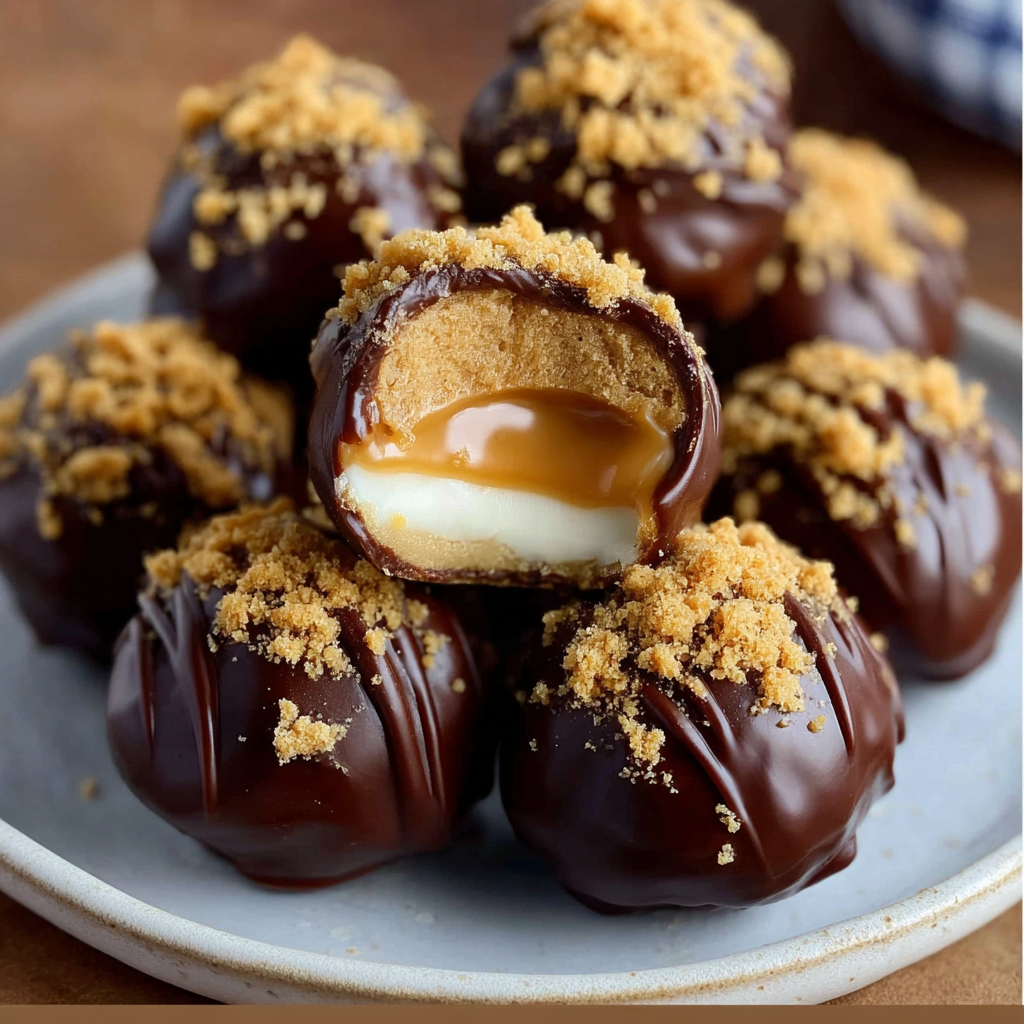
You Must Know
- High in energy: each bite is calorie-dense due to nuts, chocolate, and cream cheese so enjoy in moderation.
- Prepare ahead: centers can be made up to 48 hours ahead and kept chilled before coating.
- Freezing: freeze uncoated balls on a tray, then transfer to a sealed bag for up to 2 months. Thaw in the fridge before dipping.
- Texture: if centers become too soft while coating, return them to the fridge for 10 to 15 minutes to re-firm.
I love how versatile these bites are. For a birthday table I once coated half in milk chocolate and half in dark chocolate, then drizzled white chocolate across both for contrast. Everyone made a beeline for the plate. They are one of those recipes that feel indulgent yet are simple enough to toss together on a weeknight.
Storage Tips
Store these in an airtight container in the refrigerator for up to one week. Layer parchment between rows to prevent sticking. If you want to keep them longer, freeze uncoated centers as described above for up to 2 months. After freezing, allow centers to thaw in the refrigerator before dipping. Once coated, frozen finished balls can be stored for 1 month, but note that chocolate may develop bloom if temperature fluctuates.
Ingredient Substitutions
Swap creamy peanut butter for almond butter or sunbutter to avoid peanuts. For a lower-sugar option reduce powdered sugar to 3/4 cup and add 1 to 2 tablespoons of honey if needed for sweetness. Use gluten-free graham crackers or crushed gluten-free cookies to make them gluten-free. To make dairy-free, use vegan cream cheese and dairy-free chocolate chips. Expect minor texture changes with each swap; nut butters with less oil may produce firmer centers.
Serving Suggestions
Serve on a small platter with a mix of chocolate types for visual appeal. Garnish with sea salt flakes on some for a sweet-salty contrast. These also pair nicely with strong coffee or a dark stout beer for adults. For a party, arrange them alongside fresh fruit and a bowl of whipped cream for dipping.
Cultural Background
These bites are a modern American take on combining cheesecake flavors with confectionery techniques. Instead of a baked cheesecake, the method borrows from candy-making by forming bite-sized centers and dipping them in chocolate. The use of graham crackers as a binder has roots in traditional American cheesecake crusts and adds a familiar, nostalgic flavor.
Seasonal Adaptations
In winter, fold in a pinch of cinnamon or pumpkin spice to the filling for seasonal warmth. For spring, stir in finely chopped freeze-dried strawberries for a fruity note. During holidays, tint melted white chocolate for festive colors or press a tiny candy cane piece on top for peppermint flair.
Meal Prep Tips
Make multiple batches of centers and freeze them in single layers on a tray. When ready to serve, dip only what you need. Label containers with the date and type if you make variations. Use small silicone trays to portion uniformly and speed up rolling. For quick snack packs, place 3 to 4 balls in small airtight containers for grab-and-go treats.
These peanut butter cheesecake bites are simple, adaptable, and loved by a wide audience. They travel well, keep for days, and always feel like a special treat. I hope you make them for someone you love — they are small gestures with big returns.
Pro Tips
Soften cream cheese at room temperature for 20 to 30 minutes to ensure a lump-free filling and easier mixing.
Chill centers until firm before dipping to prevent the filling from softening and leaking during coating.
Melt chocolate gently in 30-second intervals and stir between sessions to avoid seizing and maintain a glossy finish.
Use a 1-inch cookie scoop for uniform shapes and consistent setting times.
If chocolate thickens while dipping, stir in a small amount of coconut oil to thin it and restore shine.
This nourishing no-bake peanut butter cheesecake balls recipe is sure to be a staple in your kitchen. Enjoy every moist, high protein slice — it is perfect for breakfast or as a wholesome snack any time.
FAQs about Recipes
Can I prepare these in advance?
Yes. Centers can be made 48 hours ahead and kept refrigerated. For longer storage, freeze uncoated centers for up to 2 months and thaw in the refrigerator before dipping.
How can I make these dairy-free or gluten-free?
Use dairy-free cream cheese and dairy-free chocolate to make them dairy-free. For gluten-free, swap in gluten-free graham crackers.
What's the best way to freeze them?
Freeze uncoated centers on a tray until solid, then transfer to a sealed bag. When ready to eat, thaw in the fridge and dip in chocolate.
Tags
No-Bake Peanut Butter Cheesecake Balls
This No-Bake Peanut Butter Cheesecake Balls recipe makes perfectly juicy, tender, and flavorful steak every time! Serve with potatoes and a side salad for an unforgettable dinner in under 30 minutes.
Ingredients
Filling
Coating & Garnish
Instructions
Beat the Cream Cheese and Peanut Butter
In a large mixing bowl, beat the softened cream cheese until smooth. Add peanut butter, powdered sugar, and vanilla. Beat until silky and fully combined, about 2 to 3 minutes.
Fold in Graham Cracker Crumbs
Gradually fold in graham cracker crumbs until the mixture holds together when pinched. Add crumbs in stages to reach a firm but pliable texture.
Form the Balls
Use a 1-inch cookie scoop or lightly oiled hands to portion and roll into uniform balls. Arrange on a parchment-lined baking sheet.
Chill Until Firm
Refrigerate the balls for at least 30 minutes to firm up. For best results chill for 1 hour which prevents the centers from softening during coating.
Melt the Chocolate
Melt semi-sweet chocolate with coconut oil in a microwave-safe bowl in 30-second intervals, stirring between each interval until smooth and glossy.
Dip and Garnish
Dip chilled balls into melted chocolate using a fork or dipping tool. Tap to remove excess coating and place back on parchment. Sprinkle with crushed peanuts or sprinkles before the chocolate sets.
Set and Store
Refrigerate coated bites for 15 to 20 minutes until chocolate hardens. Store in an airtight container in the fridge for up to 1 week or freeze uncoated centers for longer storage.
Last Step: Please leave a rating and comment letting us know how you liked this recipe! This helps our business to thrive and continue providing free, high-quality recipes for you.
Nutrition
Did You Make This?
Leave a comment & rating below or tag
@kitchenfunwithmy3sons on social media!
Categories:
You might also like...
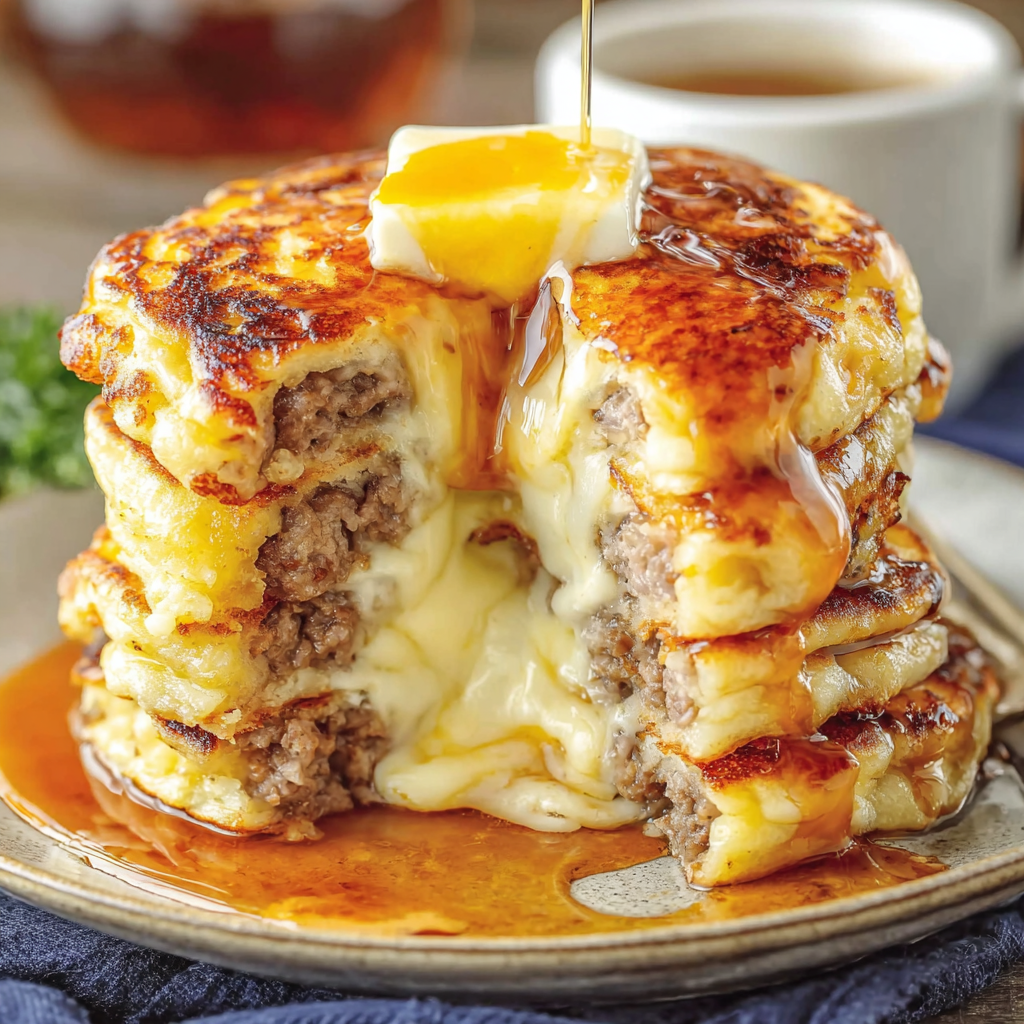
Sausage Dipped Pancakes Delight
Juicy breakfast sausages wrapped in pillowy golden pancakes — a cozy, crowd-pleasing morning treat served with warm maple syrup and fresh berries.
Fried Cheese Stuffed Doritos
Mozzarella sticks coated in crushed Doritos and fried until golden, crunchy, and irresistibly gooey — a crunchy, snackable twist on a classic favorite.
Meatball Stroganoff — Dreamy Cream Sauce
Juicy pan-seared meatballs simmered in a luscious mushroom and sour cream sauce — a comforting stovetop meal inspired by Eastern European flavors.
Did You Make This?
Leave a comment & rating below or tag @kitchenfunwithmysons on social media!
Rate This Recipe
Share This Recipe
Enjoyed this recipe? Share it with friends and family, and don't forget to leave a review!
Comments (1)
This recipe looks amazing! Can't wait to try it.
Comments are stored locally in your browser. Server comments are displayed alongside your local comments.
Hi, I'm Julia!
What's Popular
Get My 30-Minute Meals email series!
Quick and easy dinner ideas delivered to your inbox.