>>
30-MINUTE MEALS! Get the email series now →


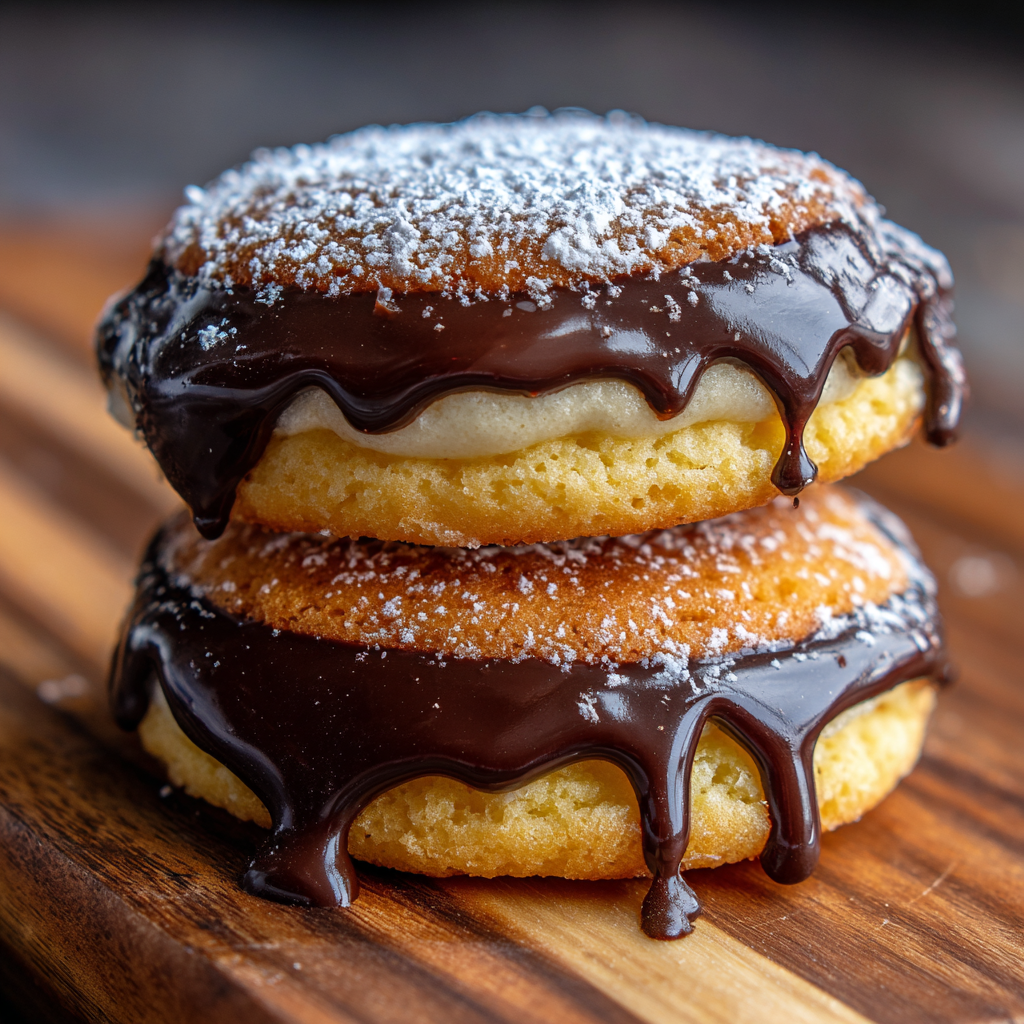
A better-than-bakery chocolate sponge that’s feather-light, tender, and layered with raspberry jam and chocolate whipped cream—perfect for celebrations or an elegant afternoon treat.
This light and airy chocolate sponge cake has a special place in my baking rotation. I first landed on this combination during a long weekend of testing sponge techniques: I wanted something taller and more delicate than a typical chocolate butter cake but with a deep chocolate flavor that still felt elegant. The result is a wonderfully tender crumb that almost melts on the tongue. Paired with a vibrant raspberry jam filling and silky chocolate whipped cream, it becomes a refined dessert that’s still comfortingly familiar.
I remember serving this at a small family gathering and watching my usually reserved uncle come back for a third slice. The sponge itself is intentionally low in fat so the texture stays light; that also makes the simple syrup step essential to keep the layers moist and tender. This version uses common pantry ingredients and straightforward techniques, but the small details—like whipping each egg component properly and in stages—make a huge difference in height and stability.
I learned early on that the simple syrup truly elevates this sponge—without it the cake can be delicate but slightly dry. Adding that thin brush of syrup keeps slices tender and allows the jam and cream to sing. Family members always comment on the balance of flavors: the cocoa and coffee deepen the chocolate notes while the raspberries brighten each bite.
My favorite thing about this cake is how it combines an almost ethereal crumb with bold chocolate presence from cocoa and a hint of instant coffee. Guests often tell me it tastes 'fancy' but feels nostalgic at the same time—perfect for both tea parties and birthdays. I’ve made it for holiday gatherings and simple Sunday desserts; every time the balance between jam acidity and creamy chocolate wins the room.
Store assembled cake in the refrigerator covered loosely with a cake dome or plastic wrap; it will keep well for 2 to 3 days. If you bake layers ahead, wrap them tightly in plastic wrap and then foil, and keep at room temperature for a few hours or refrigerate for up to 48 hours. For freezer storage, flash-freeze individual layers on a tray, then wrap and freeze up to 3 months; thaw overnight in the refrigerator before brushing with syrup and assembling. When reheating slices, let them come to room temperature for 20 minutes to allow flavors to bloom.
To make the cake dairy-free, swap the whipped cream for a chilled coconut cream whipped with powdered sugar and cocoa—note that flavor and stability change slightly. If you prefer a less sweet finish, reduce powdered sugar in the whipped cream by 1 tablespoon. For a deeper chocolate punch, replace 1 tablespoon of the vegetable oil with melted dark chocolate cooled to room temperature. Do not replace cornstarch with equal flour—it will alter the sponge’s delicate structure. If using cake flour as a substitute, only replace the all-purpose portion and keep cornstarch the same.
Serve slices with a spoonful of extra raspberry jam on the side and a drizzle of warm chocolate sauce for a dessert plate that feels restaurant-worthy. For a lighter presentation, top with a dusting of powdered sugar and a few fresh raspberries. This cake pairs beautifully with espresso or a light, fruity dessert wine. For celebrations, pipe a rosette border of whipped cream and place whole strawberries upright for a classic look.
This chocolate sponge is a variation on the classic Victorian sponge—traditionally an English cake of airy texture often filled with jam and cream. The addition of cocoa and instant coffee nods to modern adaptations that deepen flavor without weighing down the delicate crumb. Across Europe, light sponges have been paired with fruit preserves for centuries; the technique of whipping eggs for volume reflects a lineage of egg-based confections that prize aeration and finesse.
In summer, use fresh raspberries and lightly macerated sliced strawberries as an enlivening filling. During fall or winter, swap raspberry jam for a spiced cherry compote or warm orange marmalade and add a pinch of cinnamon to the whipped cream. For holiday occasions, scatter candied hazelnuts on top for crunch and roast some berries in a splash of liqueur to spoon alongside slices.
Bake the layers up to two days ahead and store wrapped in the refrigerator; prepare the jam and chilled whipped cream the day you plan to assemble so textures are optimal. If transporting, assemble the cake on a flat board inside a secure cake carrier and keep chilled until just before serving. For buffet service, pre-slice and arrange slices on a platter with small spoons of extra jam so guests can add more if they wish.
Enjoy sharing this elegant yet approachable chocolate sponge—it's one of those desserts that feels special while remaining simple to make. Let the little technique details guide you, and make it your own with seasonal fruit or a favorite jam.
Whip egg whites to stiff peaks and finish with one minute at low speed to remove large bubbles for better stability.
Brush each layer generously with simple syrup to prevent dryness—sponges contain less fat and need moisture.
Chill the mixing bowl and beaters for whipped cream to achieve maximum volume and a silky texture.
Run a thin knife around the cooled pans and invert only after they reach room temperature to avoid tearing the crumb.
This nourishing light & airy chocolate sponge cake recipe is sure to be a staple in your kitchen. Enjoy every moist, high protein slice — it is perfect for breakfast or as a wholesome snack any time.
If you don’t have a fan oven, increase the temperature to 347°F (175°C) and keep a close eye on baking time.
Yes—wrap cooled layers tightly and freeze up to 3 months; thaw in the refrigerator overnight before assembling.
This Light & Airy Chocolate Sponge Cake recipe makes perfectly juicy, tender, and flavorful steak every time! Serve with potatoes and a side salad for an unforgettable dinner in under 30 minutes.
Preheat oven to 320°F (160°C) with fan-assisted heat. Line bottoms of two 8 x 3-inch pans with baking paper; leave sides bare so batter can rise.
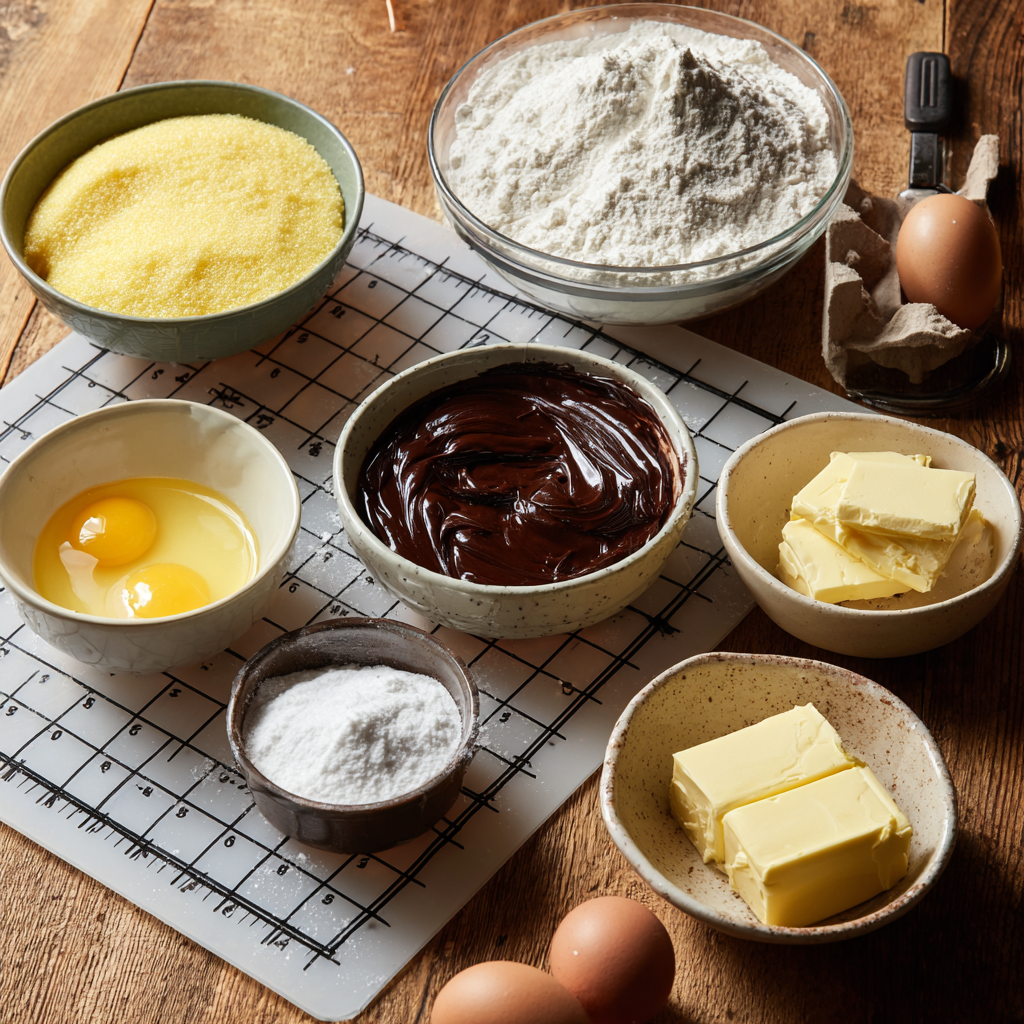
Whisk together flour, cornstarch, baking powder, cocoa, instant coffee, and salt until evenly distributed. Set aside.
Beat egg whites with white vinegar until foamy. Gradually add 1/3 cup sugar and whip to stiff peaks, about 3-4 minutes total. Set aside.
Mix remaining 1/3 cup sugar with warm water, then whisk in egg yolks and vanilla on medium-high until pale and ribboning (4 minutes). Stream in oil while mixing.
Fold half the egg whites into yolk mixture gently, sift in half the dry ingredients and fold. Add remaining dry ingredients and egg whites, folding until just combined to preserve air.
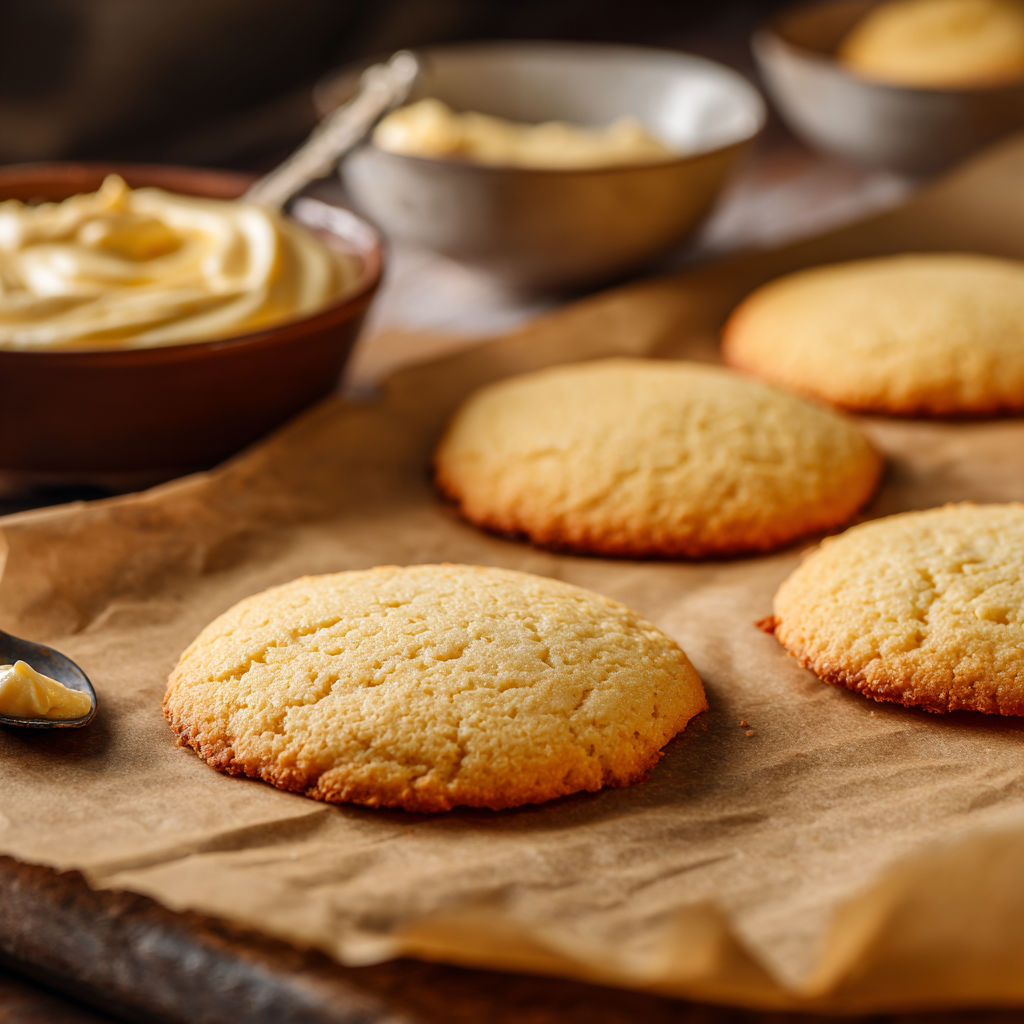
Divide batter between pans, tap to remove large bubbles, run knife to pop remaining pockets, and bake ~20 minutes. Tap pans on counter and invert pans onto a wire rack to cool upside down.
Dissolve 1/4 cup sugar in 1/4 cup boiling water and brush over the top and sides of each cooled layer to lock in moisture.
Chill bowl and beaters. Whip cold cream with powdered sugar, cocoa, and vanilla to stiff peaks; avoid overwhipping.
Place one layer on a board, spread raspberry jam, arrange strawberries, add a generous layer of chocolate whipped cream, top with second layer and finish with more cream and berries.
Last Step: Please leave a rating and comment letting us know how you liked this recipe! This helps our business to thrive and continue providing free, high-quality recipes for you.
Leave a comment & rating below or tag
@kitchenfunwithmy3sons on social media!
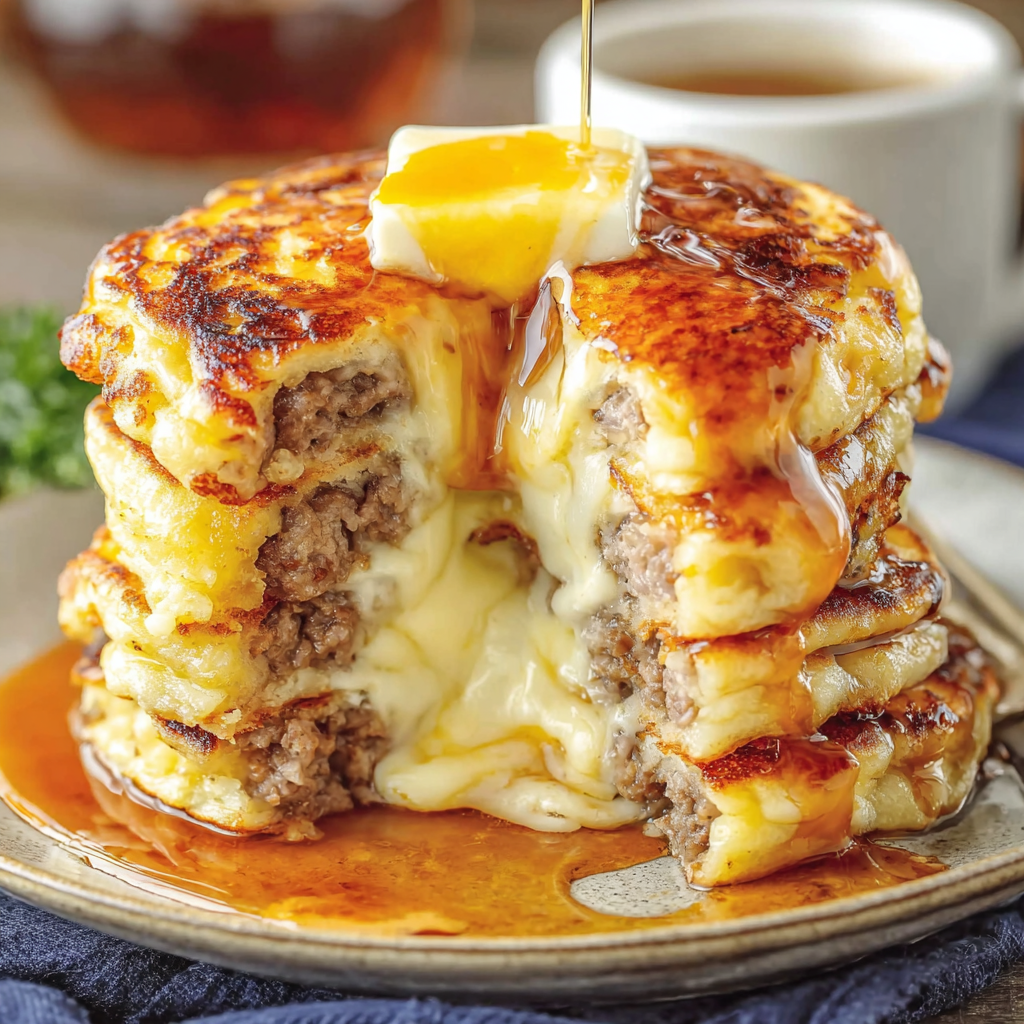
Juicy breakfast sausages wrapped in pillowy golden pancakes — a cozy, crowd-pleasing morning treat served with warm maple syrup and fresh berries.

Mozzarella sticks coated in crushed Doritos and fried until golden, crunchy, and irresistibly gooey — a crunchy, snackable twist on a classic favorite.
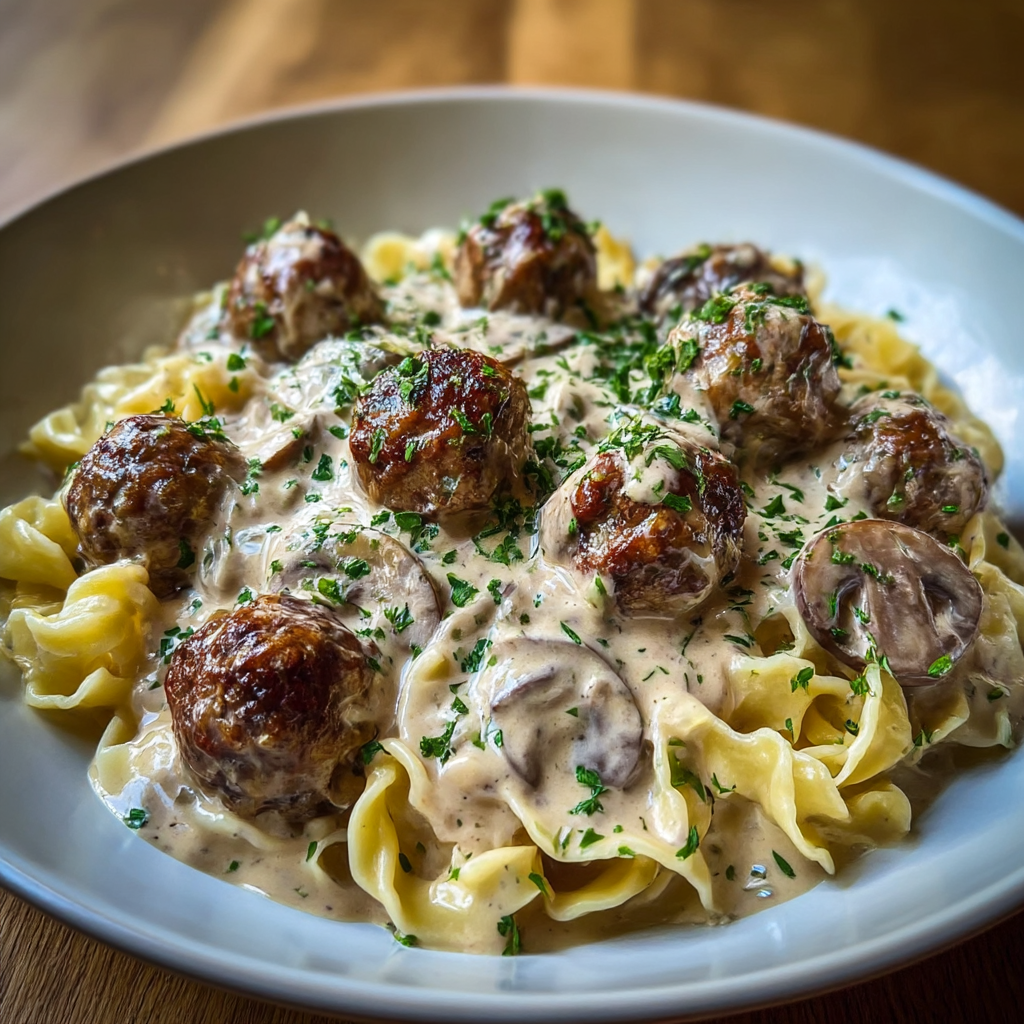
Juicy pan-seared meatballs simmered in a luscious mushroom and sour cream sauce — a comforting stovetop meal inspired by Eastern European flavors.
Leave a comment & rating below or tag @kitchenfunwithmysons on social media!
Enjoyed this recipe? Share it with friends and family, and don't forget to leave a review!
This recipe looks amazing! Can't wait to try it.
Comments are stored locally in your browser. Server comments are displayed alongside your local comments.
Quick and easy dinner ideas delivered to your inbox.