>>
30-MINUTE MEALS! Get the email series now →


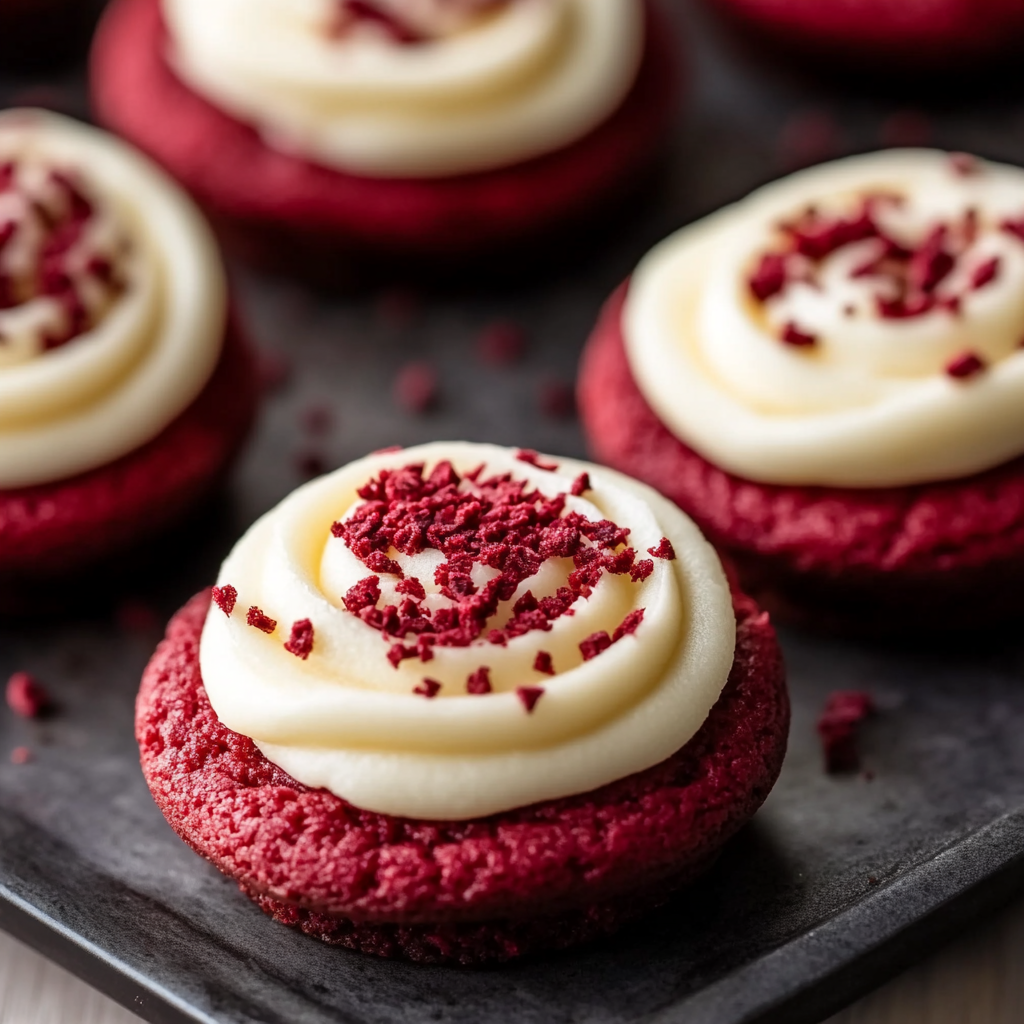
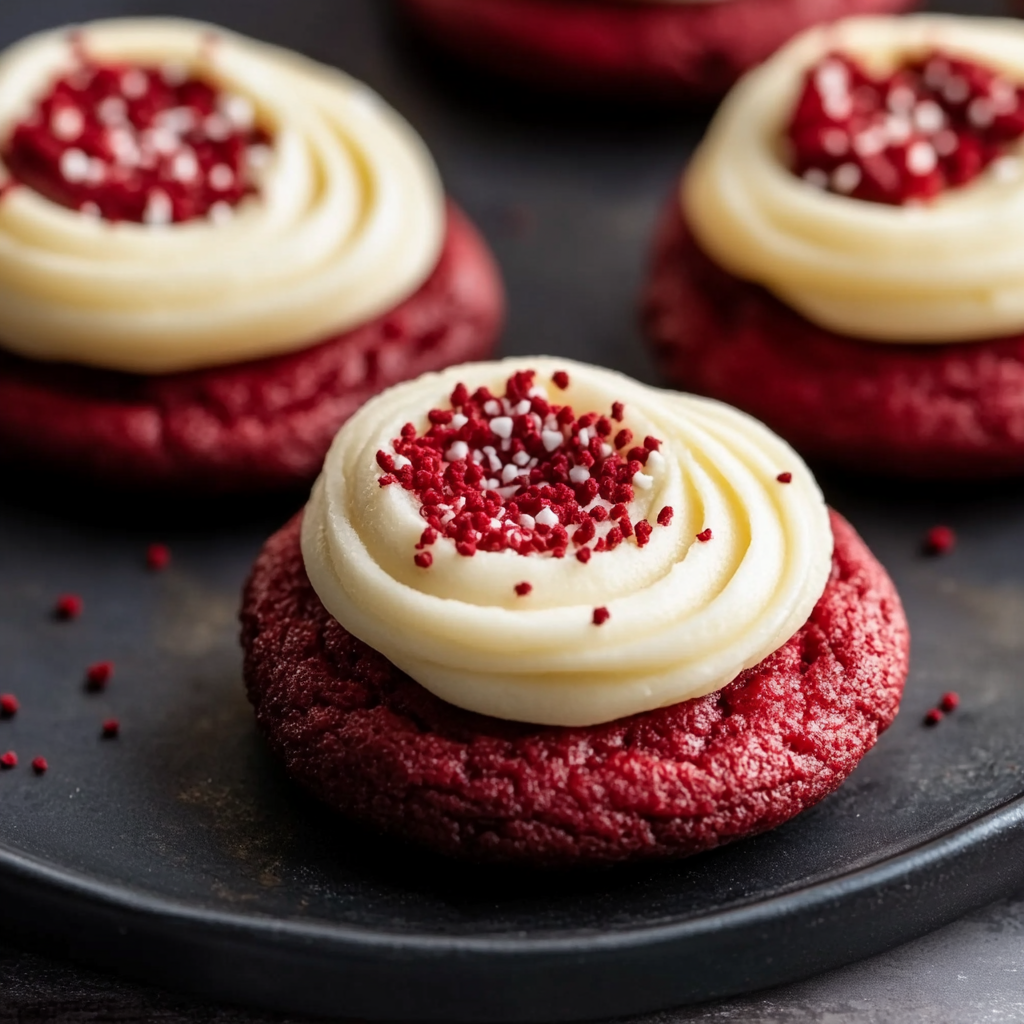
A delightful cross between chewy cookies and tender cupcakes—airy domed centers, chewy edges, and a swirl of silky cream cheese frosting. Perfect for holidays and special treats.
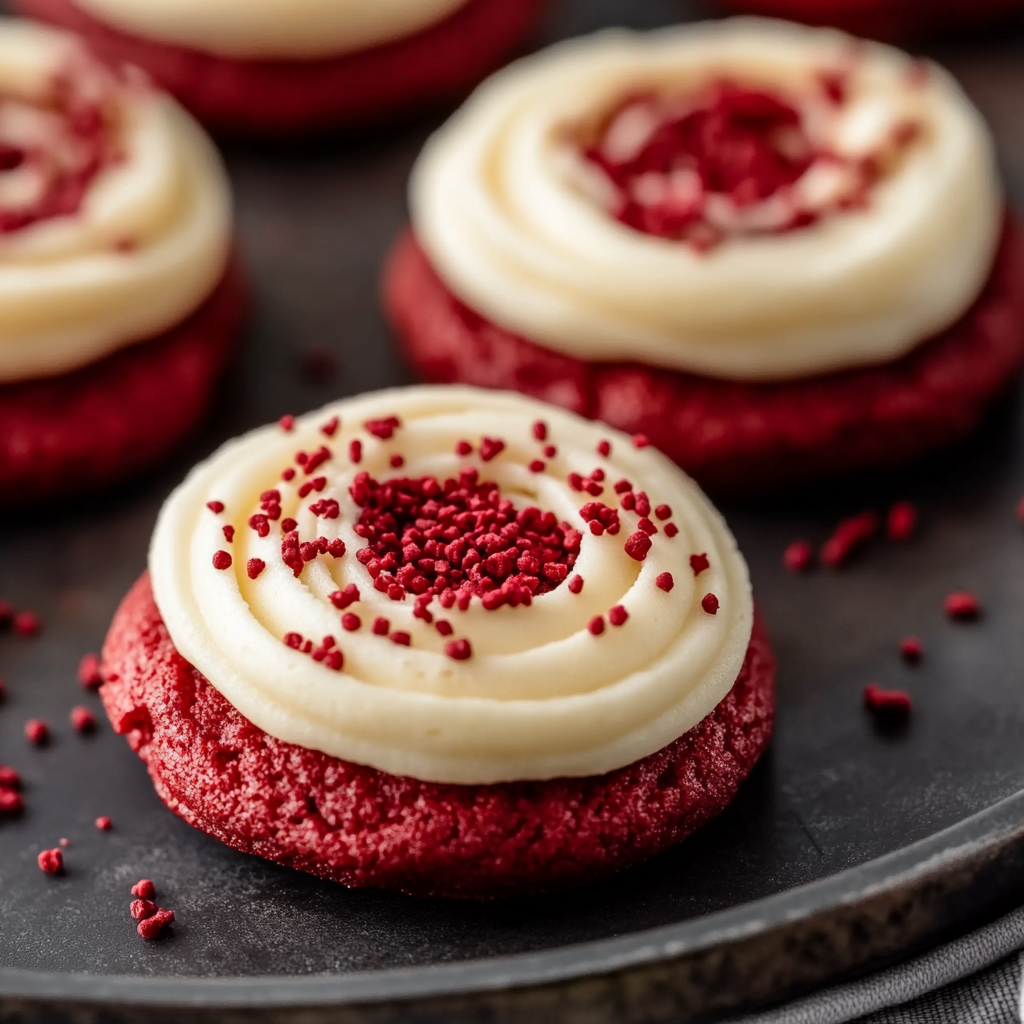
This recipe is my go-to when I want something that feels indulgent but still a little playful: soft, domed cookies that rise like cupcake tops and stay chewy at the edges. I first developed these when a friend asked for a cookie that had the texture of a cakey cupcake but the convenience of a cookie for a holiday gathering. The texture surprised everyone—the centers are tender and lift into a delicate dome while the outer rim keeps that classic cookie chew. The bright, slightly tangy red dough paired with the smooth, rich cream cheese frosting always brings an excited murmur from family and guests.
I discovered the balance between cupcake-like airiness and cookie chew during a rainy afternoon of experimenting with different proportions of butter, oil, and a touch of cornstarch to soften the crumb. The addition of vinegar and a bit of instant milk powder lifts the flavor and deepens the velvet profile, while the cream cheese frosting adds the familiar tang that complements cocoa in the dough. These have become my party trick: people assume they are mini cupcakes until they bite into the satisfying cookie texture. They’re perfect for a Valentine’s spread, birthday platter, or whenever you want a nostalgic treat with a grown-up frosting.
In my own kitchen these cookies have become a holiday standard. I made a double batch last December for a cookie exchange and came home with empty containers and requests for the recipe. My niece still asks for the “red cake cookies” and loves to help crumble the leftover bits for garnish, which always makes me smile.
My favorite thing about these is how they change the dynamic of a cookie tray—people pick them up expecting a standard cookie and are delighted by the cakey dome and tangy frosting. At a recent potluck, a colleague asked for the recipe and then sent a photo of her children proudly holding the last two cookies; little victories like that keep me baking.
Store unfrosted cookies in an airtight container at room temperature for up to 48 hours. For longer storage, freeze fully baked cookies in a single layer on a sheet until firm, then stack with parchment between layers in a freezer-safe container for up to 3 months. Thaw in the refrigerator or at room temperature before frosting. Frosted cookies keep best refrigerated in a single layer with plastic wrap over the container for up to 4 days; bring to room temperature before serving so the frosting softens and the flavor opens up.
For a dairy-free version, substitute vegan butter and a dairy-free cream cheese alternative; note the flavor will be slightly different and frosting texture may shift. If you only have gel food color, use a bit less than the liquid-gel amount—start with 1 tsp. Swap vegetable oil for light olive oil or melted coconut oil if preferred, but avoid strong-flavored oils. For a slightly lighter cookie, replace 1 tablespoon of flour with 1 tablespoon of cake flour to increase tenderness.
Serve these with a cup of coffee or a glass of cold milk; they also pair beautifully with berry compote or a small scoop of vanilla ice cream for a festive dessert plate. For parties, arrange on tiered trays and garnish with crushed freeze-dried raspberries or extra cookie crumbs for contrast. They’re perfect for Valentine’s Day, baby showers, or as a crowd-pleasing addition to a holiday cookie exchange.
Red velvet has roots in classic American baking where the interplay of cocoa and acidity created a distinctive velvet crumb and vibrant color. While the exact origin is debated, the modern red velvet cake became iconic in Southern baking and later surged in popularity with the rise of cream cheese frostings and boxed cake mixes. These cookies reinterpret that beloved flavor profile into an approachable hand-held format, honoring the original velvet character while offering a portable, shareable form often seen at modern bakeries.
In winter, fold a teaspoon of orange zest into the frosting for a citrus lift that cuts through the richness. For spring, add a sprinkle of edible rose petals or use pastel-colored sprinkles for events. Around the holidays, top with crushed peppermint for a festive twist. Adjust food coloring intensity for seasonal themes—deeper red for holiday warmth or softer pinks for spring gatherings.
Portion dough with a scoop and freeze the mounds on a tray until firm, then transfer to a bag for quick baking: add a minute or two to the bake time from frozen. Bake-only days allow you to frost the cookies the next day for fresher texture. Keep frosting chilled in an airtight container up to 2 days and bring to room temperature before piping. Use disposable piping bags for easy cleanup at large events.
These frosted red velvet cupcake cookies bring the nostalgia of classic red velvet into an approachable, versatile treat. Whether you’re baking for a crowd or a cozy night in, they’re easy to personalize and always make people smile—so grab your scoop and enjoy sharing them.
Use a 3 to 4 tablespoon scoop to get the signature domed shape and consistent bake times.
Chill frosting 30–60 minutes if it’s too soft to pipe; this firms it without altering flavor.
If dough is too sticky to handle, chill 10–15 minutes to make scooping easier.
Rotate baking sheets halfway through baking if your oven has hot spots for even coloring.
Crumble any imperfect cookies to use as a decorative topping for frosted cookies.
This nourishing frosted red velvet cupcake cookies recipe is sure to be a staple in your kitchen. Enjoy every moist, high protein slice — it is perfect for breakfast or as a wholesome snack any time.
Freeze baked cookies for up to 3 months; thaw and then frost for best texture.
Use gel or liquid-gel food coloring; powdered is concentrated—avoid liquid food coloring if possible.
This Frosted Red Velvet Cupcake Cookies recipe makes perfectly juicy, tender, and flavorful steak every time! Serve with potatoes and a side salad for an unforgettable dinner in under 30 minutes.
Preheat oven to 350°F and line two large baking sheets with parchment paper. Position racks in the center for even heat circulation.
Whisk together 1 1/2 cups all-purpose flour, 1/4 cup cocoa, 1 tablespoon instant milk powder, 1 tablespoon cornstarch, 1/2 teaspoon baking powder, 1/4 teaspoon baking soda, and 1/4 teaspoon salt until evenly combined.
In a large bowl, whisk 1/2 cup softened butter, 3 tablespoons vegetable oil, 1/2 cup packed brown sugar, and 1/2 cup granulated sugar until smooth and slightly aerated.
Whisk in 1 large egg and 1 teaspoon vanilla. Stir in 1 teaspoon white vinegar and 1 to 2 teaspoons red gel food coloring until well combined; the color will deepen when dry ingredients are added.
Fold dry ingredients into wet mixture until a thick, sticky dough forms. If dough is too soft to handle, chill it for 10–15 minutes before scooping.
Use a 3 to 4 tablespoon cookie scoop to place mounds 3 inches apart on prepared sheets. Bake at 350°F for 12–15 minutes until puffed and lightly golden at the edges.
Cool cookies on the sheet 5 minutes, then move to a wire rack to cool completely. Beat 3 ounces cream cheese with 6 tablespoons butter, add 1 teaspoon vanilla and 1 1/2 cups powdered sugar until smooth; chill if too soft.
Pipe or spread frosting onto cooled cookies. Crumble any imperfect cookies and sprinkle crumbs on top as decoration. Serve at room temperature.
Last Step: Please leave a rating and comment letting us know how you liked this recipe! This helps our business to thrive and continue providing free, high-quality recipes for you.
Leave a comment & rating below or tag
@kitchenfunwithmy3sons on social media!
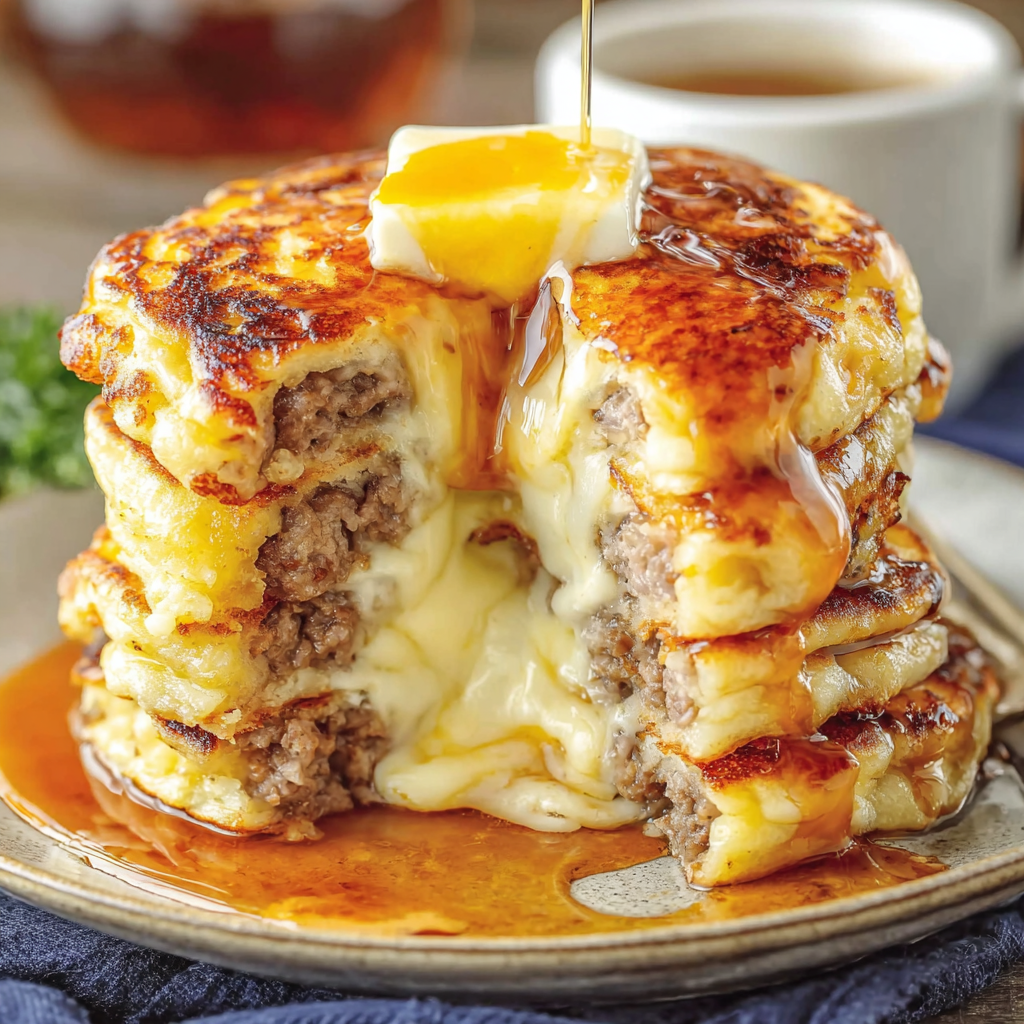
Juicy breakfast sausages wrapped in pillowy golden pancakes — a cozy, crowd-pleasing morning treat served with warm maple syrup and fresh berries.
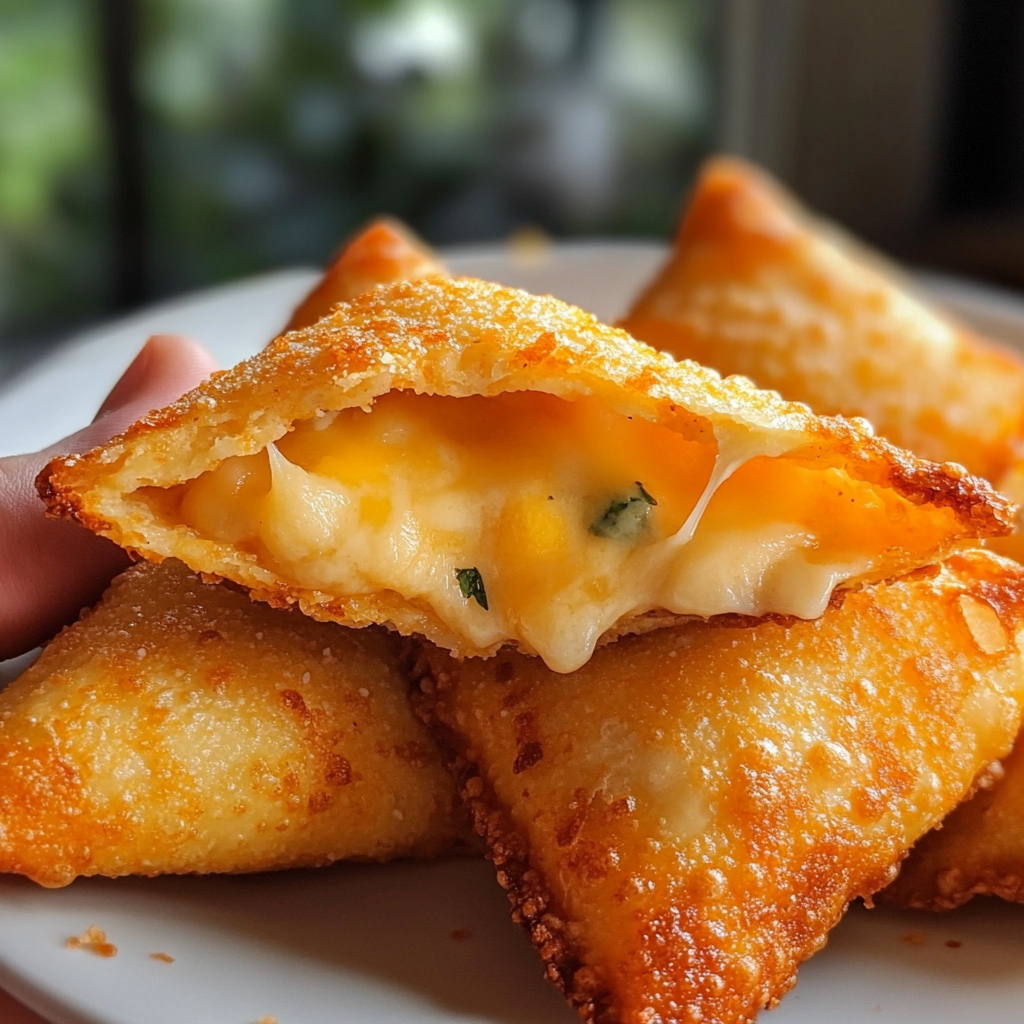
Mozzarella sticks coated in crushed Doritos and fried until golden, crunchy, and irresistibly gooey — a crunchy, snackable twist on a classic favorite.
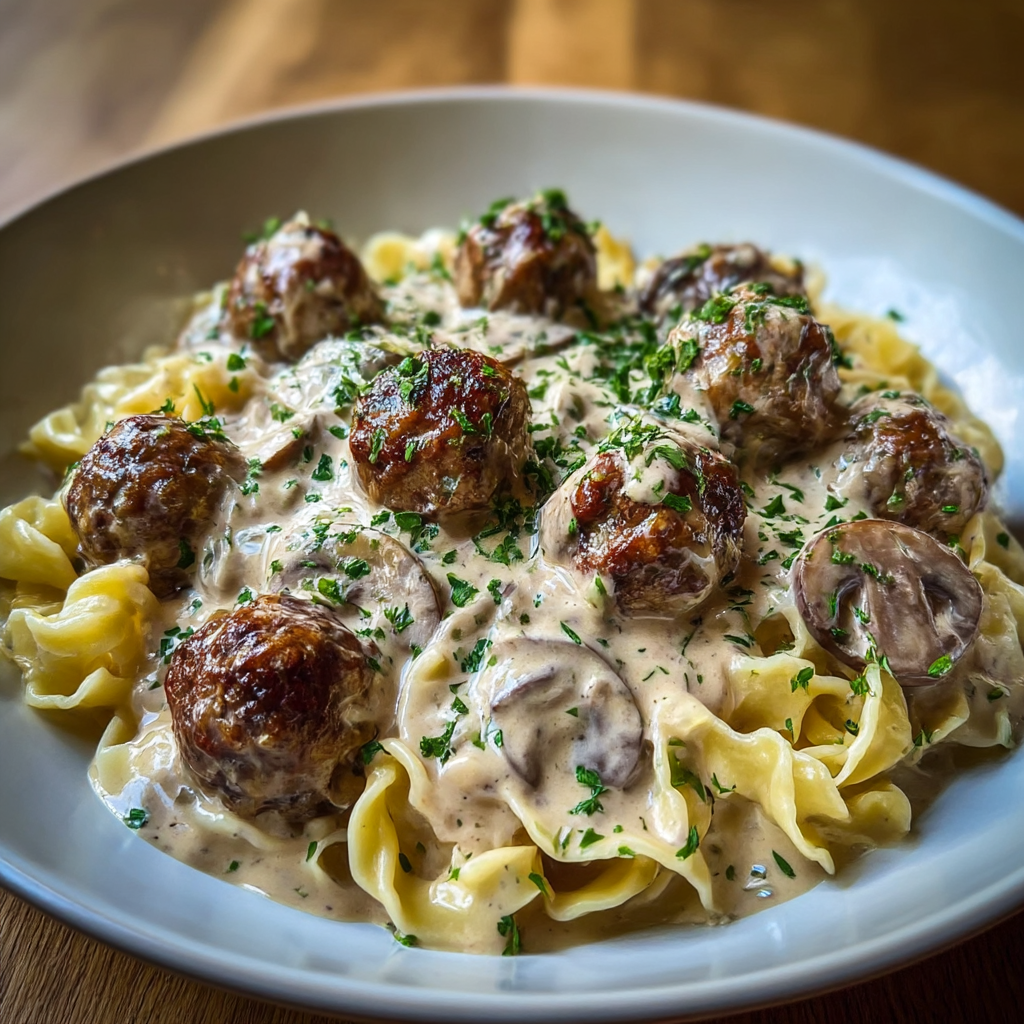
Juicy pan-seared meatballs simmered in a luscious mushroom and sour cream sauce — a comforting stovetop meal inspired by Eastern European flavors.
Leave a comment & rating below or tag @kitchenfunwithmysons on social media!
Enjoyed this recipe? Share it with friends and family, and don't forget to leave a review!
This recipe looks amazing! Can't wait to try it.
Comments are stored locally in your browser. Server comments are displayed alongside your local comments.
Quick and easy dinner ideas delivered to your inbox.